ADVANCED DESIGN

DSGN.210.02

Introduction

Advanced design will build on the knowledge and set of tools that was acquired during intro to design and typography. These skills will be expanded on while pushing your understanding of how your solutions work within both a theoretical and realistic world environment. While a student, there should be certain liberties offered to you as you work through your ideas and push your understanding of what design is, can be and ultimately what it solves.

With each project, constraints will allow you to understand how certain ideas will and will not work in the real world. You will at times be faced with limitations that confine possibilities. Number of colors, a specific size or even a general direction can become a launch pad of creativity. It should never be seen as restrictive but rather an opportunity to push your ideas further and view the problem from multiple angles.

In this class, you will be facing a number of realistic design problems. Creating a fantastic design that is flawlessly executed is not good enough. Solving a complicated problem and working within those guidelines and developing a solution that exceeds expectations IS what you all should strive for. Remember to ask questions. At the beginning but also throughout the process. Always check back with specs and ask, am I solving what I am suppose to be? Have I strayed too far from my objective?.


Below are the projects you will be working on this semester. Each project will have an accompanying handout with specific outcome goals and a detailed schedule. As we finalize the project and you submit the design files, each project will be displayed so everyone will have the opportunity to look at what each student had developed. Previous student projects will also be available to look over.

Jump to the Current Project
30 AUG

Kathryn

Jason

Claire

Katherine

Kara

Julia

Project One

Logo Development for Organization

  • Project Start : 30 August
  • Class Crit : 27 September
  • Project Due : 02 October

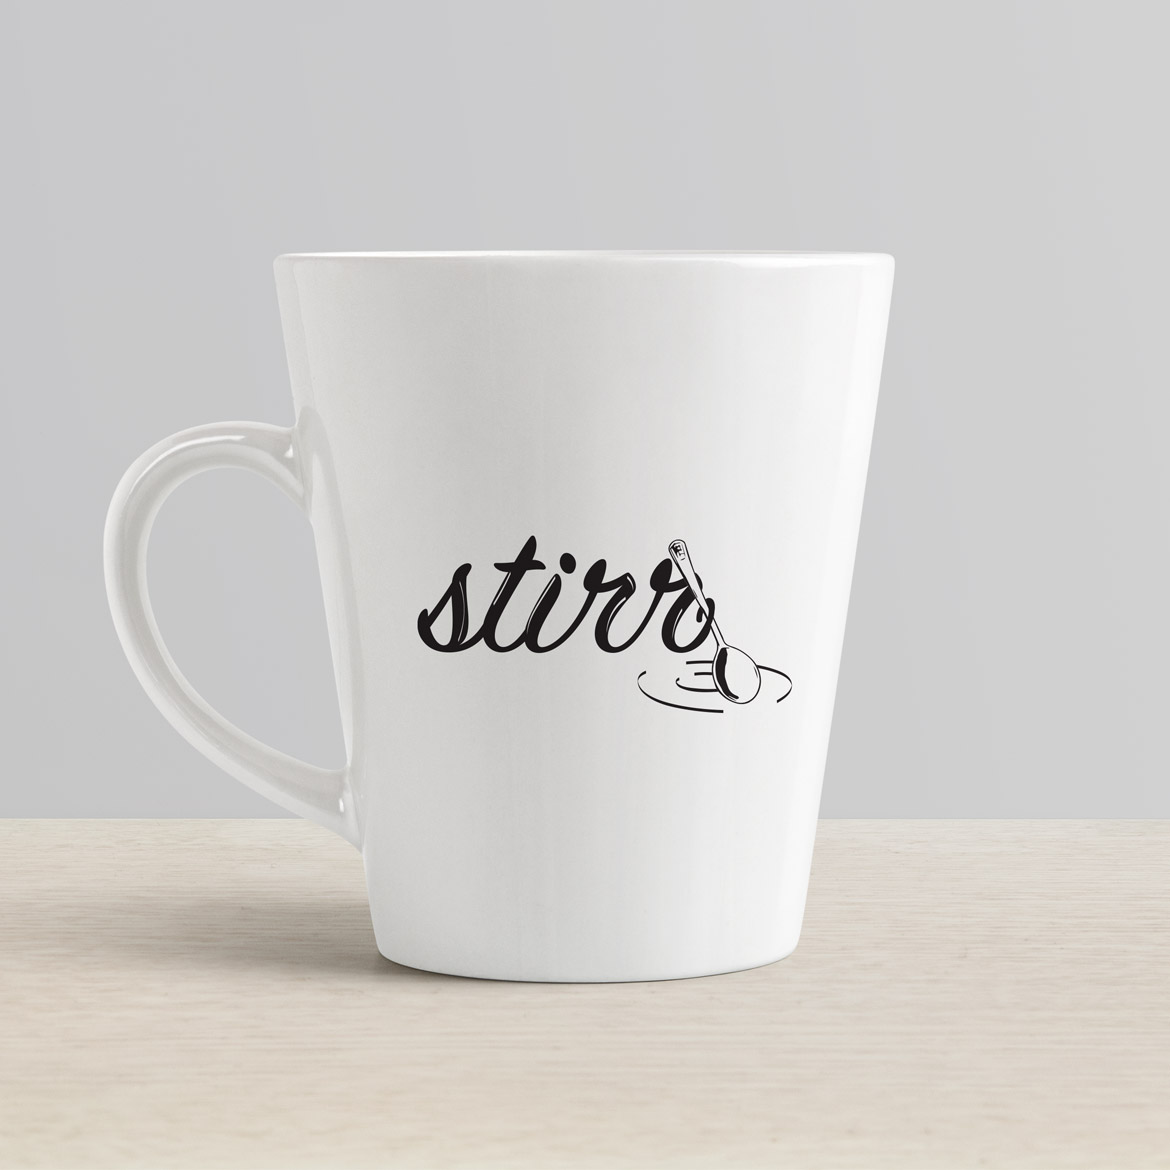
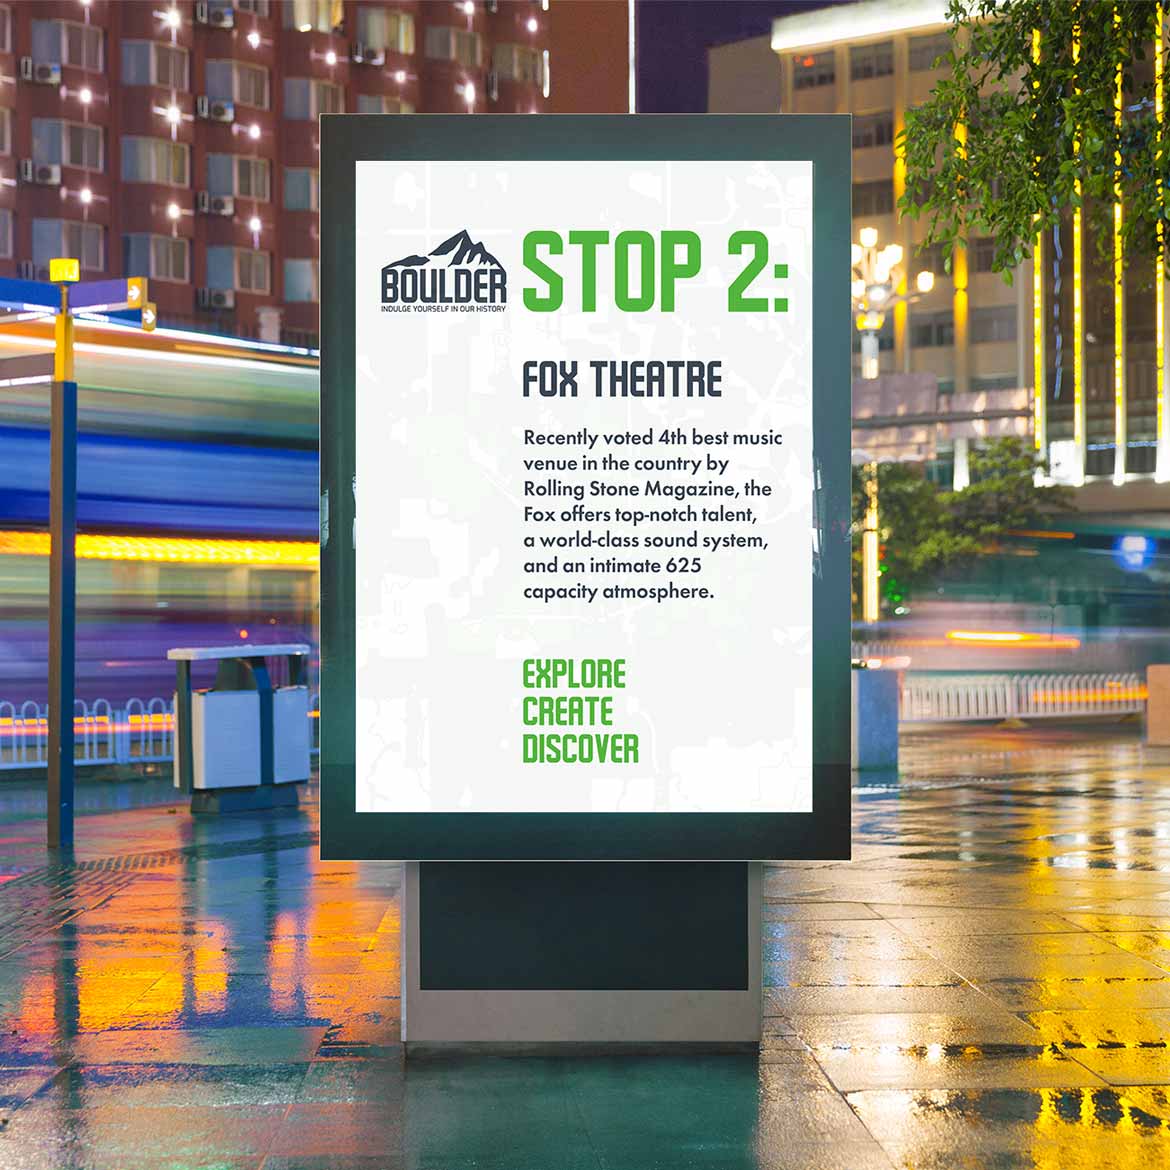
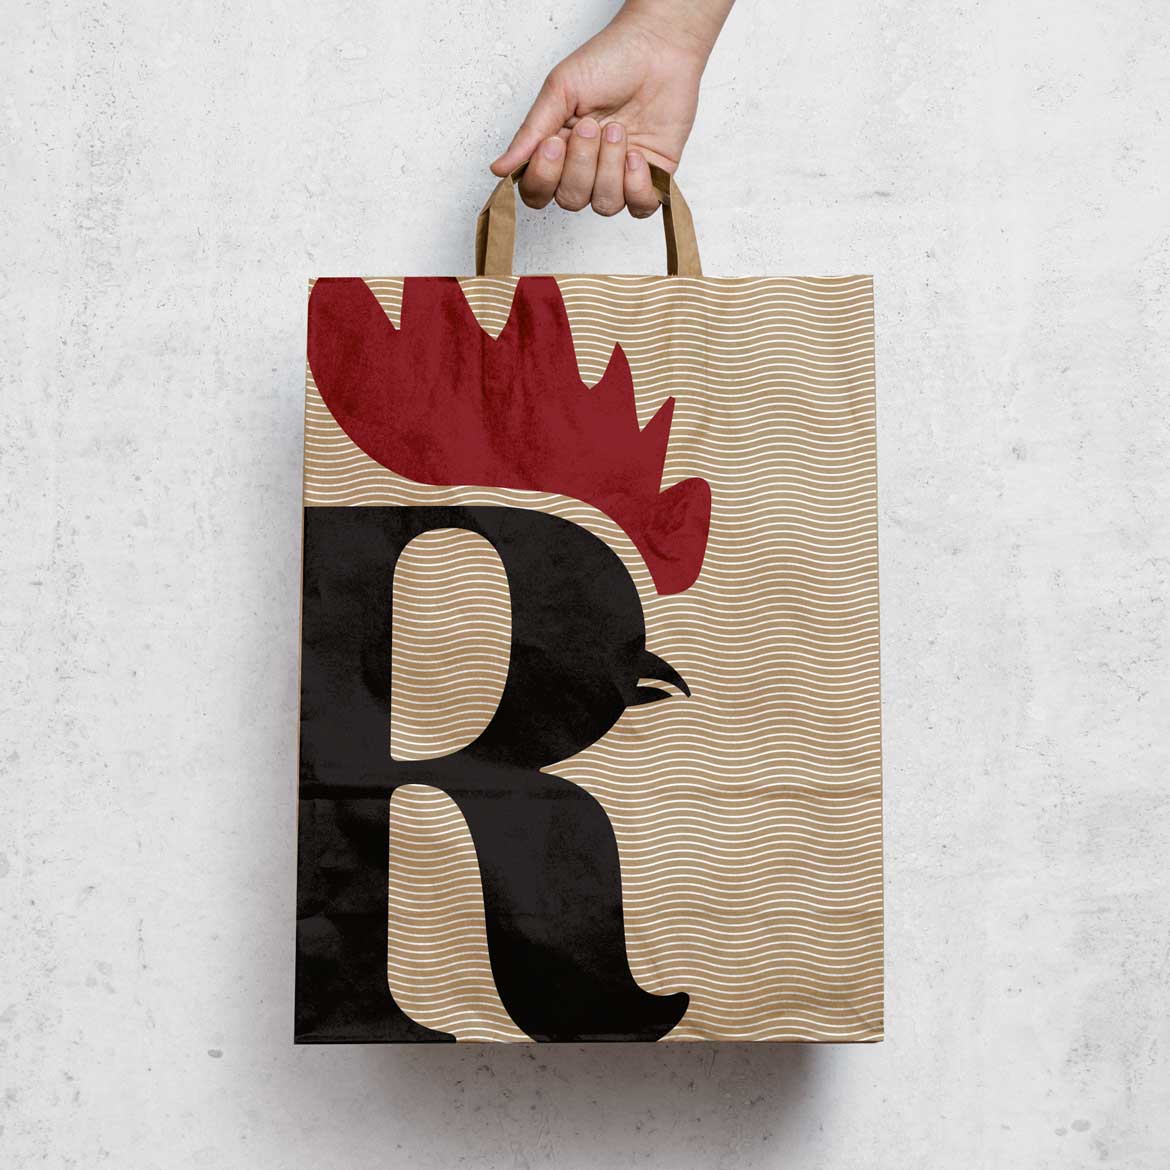
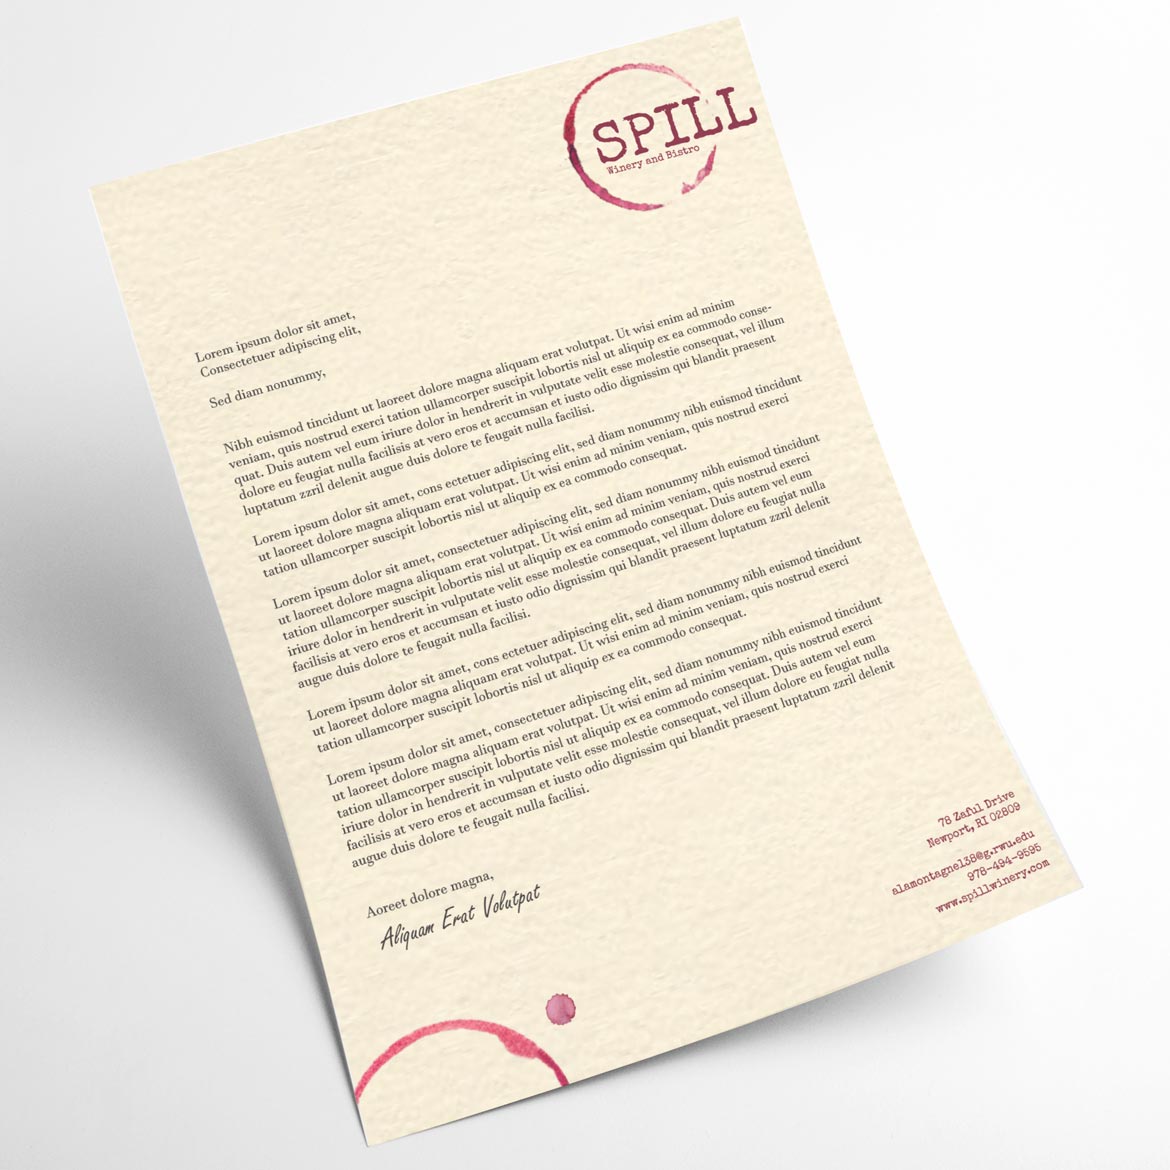
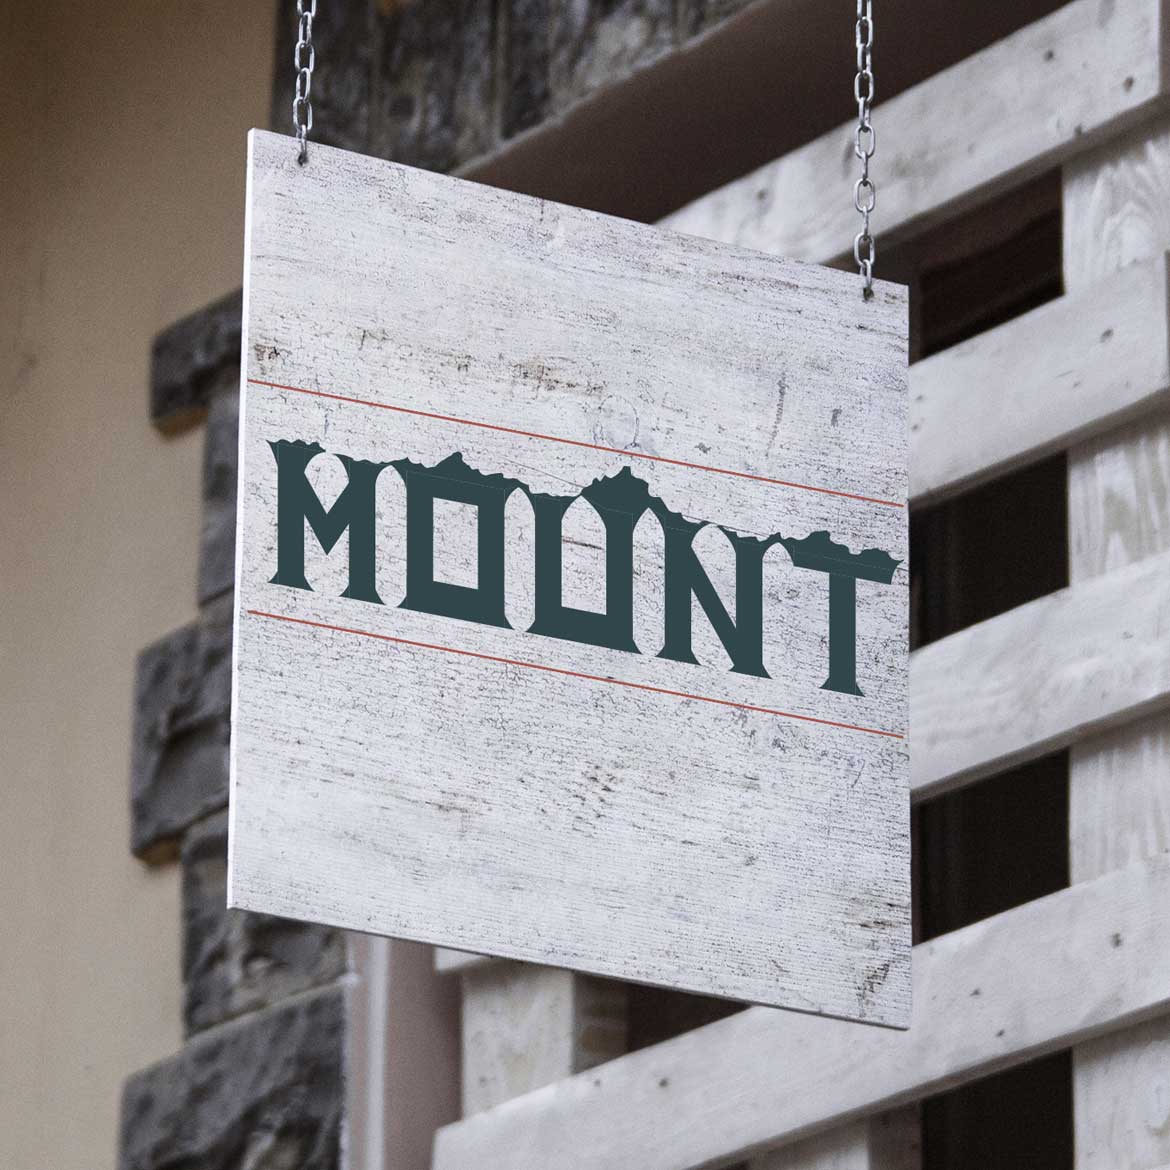
Recreate a logo for a local community service, in RI or your home area. The logo must incorporate an icon with the type treatment that would allow for the mark to be used separately in subsequent designs.

Download Project Handout

project overview

This project will focus on a local [to the area in Bristol or a place near your home town] non profit organization. You are asked to develop the re-branding of a company that incorporates a mark/icon with the type treatment. This icon could then become the staple in all other designed elements. Think about the imagery that is synonymous with the service this company provides. Think about the colors and typefaces that would help people connect this brand with the services and industry that it serves. As the logo becomes solidified, apply rules you have developed to create the subsequent design pieces to strengthen the visual brand.

gained knowledge

At the conclusion of this project, you will have created an entire set of rules and a system for a company identity. You will understand the importance of consistency for building a brand and how these rules are enforced. You will better understand how to use Illustrator in creating files for both print and screen use and how to use certain tools to create a logo with a branding guideline. You will have used both illustrator and photoshop to develop designs that strengthen the visual brand while working in both a vector and pixel environment.

  • type tool and multiple ways of inserting text
  • looking at typefaces and characteristics for each chosen face
  • using the paragraph options
  • pen tool
  • different selection tools and when each are used
  • rectangle tool and use of guides
  • color books along with spot colors

project requirements

  • new logo development
    • color version - no more than 3 spot colors
    • black and white logo
    • one color version
    • reversed on black background
  • business cards that also serves as informational / marketing tool
  • two sided design that is set up for print utilizing
    • proper bleeds / margins / sizing
    • name of an individual with the organization
    • address / phone / email / url
    • back of design should focus on the services of this organization
  • you must identify the print service you will be using for these cards
  • one page website that responds to both tablet/laptops and phones - mock up only

grading scheme

  • 5 of 5 : the quality and aesthetic appeal of the logo itself - showed four versions of the finished logo
  • 1 of 1 : milestone | showing mood board / research
  • 4 of 4 : uniqueness & creativeness of the design - how well was the design problem solved
  • 3 of 3 : strength of all the pieces as a whole / consistency - business card and responding website mockup
  • 1 of 1 : milestone | uploaded logo breakdown
  • 2 of 2 : research/process of the project - mood board
  • 2 of 2 : following project specifications
  • 2 of 2 : preparedness & participation

project one overview

after picking the organization you will be working with, start looking at logos within the industry - colors, typefaces used, imagery [both illustration and photography]

  • choose an organization and research the industry
  • create a mood board or file to contain all of your findings and notes
  • look at logo designs, colors and typefaces used - are there similarities? why?
04 SEP

no class

labor day - have a nice long weekend

06 SEP

Class 02 of 08

come to class with a organization chosen

  • continue looking at existing organization
  • sketch out ideas and concepts
  • begin thinking about how unique glyphs in the name form and create combinations - how an icon can compliment the name
11 SEP

Class 03 of 08

come to class with progress on your logo design

  • look at both caps or mixed or all minuscule glyphs
  • start developing your logo and integrating an icon
  • start working on the logo and integrating an icon through sketching and notes first, then bring into the computer
  • think about how this logo can transform into different orientations and still hold the brand intact
  • start thinking what color schemes will place your shop into the scene while providing separation from competitors
13 SEP

Class 04 of 08

come to class with progress on your logo design showing three UNIQUE ideas

  • continue developing your logo and integrating an icon
  • start thinking about the business card design
  • finalize the color scheme
18 SEP

Class 05 of 08

come to class with progress on the business card

  • finalize the logo and begin thinking how the logo can respond to different orientation applications
  • continue working on the business card - think about how this card will be used
  • work on the website concept - what elements should be incorporated - use existing site as a foundation
20 SEP

Class 06 of 08

come to class with progress on the website design concept

  • continue working on the business card - who would be printing this card - make sure the specs are correct
  • continue to work on the website and think about how the design will change from a wider screen to a narrow phone
  • ask who would be visiting the website and for what reason?
25 SEP

Class 07 of 08

come to class with answers to who will be using the website and for what reasons

  • with those questions answered - does the design serve those needs
  • does the business card back design play into those needs and help become a tool for the organization
  • are the two design pieces playing off one another and begin to build a visual brand
  • does the logo remain strong across both design pieces
27 SEP

Class 08 of 08

class crit second half of class

  • take time during the first half to wrap up your work and prepare for the crit
  • every single piece must be completed to receive credit for participation - only the business card needs to be printed
  • allow time to reflect on the feedback and how it may help strengthen your project
  • remember the sponge and brick metaphor
02 OCT

projects are due

uploaded to the google drive

  • upload your designs to the google drive IN A SINGLE PDF
02 OCT

Alex

Kate

Nicholas

Jackie

Kelly

Julia

Project Two

Package Design for Small Item

  • Project Start : 02 October
  • Class Crit : 23 October
  • Project Due : 25 October

Create packaging for a small toy that has nostalgic history. The design should be developed to give the person buying it a memorable experience of opening it along with a history of the toy itself.

Download Project Handout

project overview

This project will focus on a reissue of a pop culture iconic toy or item that is rich in history and nostalgic. You must approach the project from the uniqueness that the item possesses while catering to the customer who would be interested in this particular piece. Design for the toy itself and the information that must be incorporated. Do not design a cookie cutter packaging that is very cool yet has no connection to the artifact.

This project is multi layered in it’s approach, the packaging must offer protection, it has to display the item’s unique characteristics, an historical record to help promote the nostalgic feeling and provide a memorable experience in interacting with the packaging. This package design is as important as the item itself. If the design is ripped during the opening process, it fails. If the person is swearing and tearing the packaging to free the item from the clutches of your design - it fails. A pleasant and enjoyable experience that can then have the item placed back within the packaging design is the goal.

You must take photos of your item and incorporate at least one of the photos into the layout of the packaging. Use whatever means you have to take these photos. You will also be taking photos of the finished design for social media promotion.

The interaction component must also incorporate the distinct feeling of multiple materials throughout. Allow the person opening this design to work through the package with the sense of feeling. Think about how a smooth matte paper feels then moving to a felt like material that holds the item. It adds a level of interaction beyond sight.

The type treatment for the name of the toy can not be a flat design. Layering is the direction for this portion of the project. The treatment has to capture the essence of the toy and what it represents to the people interested in this.

Craftsmanship is vital to the success of this project.

gained knowledge

With the completion of this project, you will have continued your work in developing designs for specific items and having elements in both the structure and aesthetic speak directly to that item. Knowing your product is important and understanding how it requires a different approach will be addressed. You will also have built on the knowledge of how to gain protection through the use of cuts and folds in the paper stock. Strengthening your illustrator skill set and preparing files for commercial production.

project requirements

  • unique packaging design showcasing the it
    • history of the item must be included
    • at least one photo of the item must be incorporated
    • details for the item [ material, country of origin, manufacture logo ]
    • unique upc design
    • three different materials [ NO PLASTIC ] must be used - textile feel
    • layered type treatment for name - no flat type
  • two different social media post layouts
    • showing the packaging with toy outside packaging
    • toy with the type treatment name

grading scheme

  • 5 of 5 : the quality and creativeness of the packaging - experience of interaction with packaging
  • 1 of 1 : milestone | show history & research
  • 4 of 4 : type treatment of the name - how strong is the representation of the item
  • 3 of 3 : craftsmanship and use of materials - use of three materials throughout
  • 1 of 1 : milestone | photograph prototype of packaging
  • 2 of 2 : research/process of the project - mood board
  • 2 of 2 : following project specifications
  • 2 of 2 : preparedness & participation

project two overview

bring your toy or item to class

  • research and gather history regarding your item - what significance does it hold for people interested in it
  • think about the shape of the packaging and how it will be interacted with
  • measure your toy and begin to set up your document - this can and should be changed during the design process
  • create your mood board
04 OCT

class 02 of 07

come to class with all research completed

  • look at existing packaging similar to yours
  • sketch out ideas and concepts for the packaging
  • begin working on the name type treatment in the packaging document
09 OCT

class 03 of 07

continue to progress your ideas

  • begin to bring elements into your layout, even as place holder
  • continue to work on the type treatment
  • think about shape and size and how the packaging will open and re-close
11 OCT

class 04 of 07

come to class with progress

  • drop your history text into the document
  • continue to work on the type treatment for the name
  • start thinking about what materials will work with your direction
  • keep pushing the shape and interaction of the packaging shape and size
  • photograph the toy and clean up in photoshop - prepare file to bring into illustrator
16 OCT

class 05 of 07

come to class with progress on the packaging

  • refine your packaging design with materials and how a person will interact with it
  • start bringing elements together in the document
  • print out your design - to scale [ in pieces if you need to ]
18 OCT

class 06 of 07

come to class with packaging printed

  • refine the interactive component of the project - does it offer a pleasant experience
  • begin working on the social media designs - photograph the packaging with the toy outside
  • are all of the specs and requirements of the project accounted for in your design
  • how does the packaging flow from side to side visually
23 OCT

Class 07 of 07

class crit second half of class

  • take time during the first half to wrap up your design for the crit
  • packaging printed and social media designs uploaded
  • allow time to reflect on the feedback and how it may help strengthen your project
  • remember the sponge and brick metaphor
25 OCT

projects are due

uploaded to the google drive

  • upload your designs to the google drive IN A SINGLE PDF [ packaging file with two social media files ]
25 OCT

Julia

Sabrina

Grace

Harper

Katie

Julia

Project Three

Publication Design for Mailer

  • Project Start : 25 October
  • Class Crit : 15 November
  • Project Due : 20 November

Create a brochure for any state wide ballot measure in the upcoming vote that will also serve as a door hanger.

Download Project Handout

project overview

In this project, you are tasked with creating a brochure for any state wide ballot measure in the upcoming vote. The brochure will be designed as a door hanger and left on the front door of people who may not be home during the time of visit. The design must instantly capture the person’s attention and quickly explain what the point of this material is. Break down the information into smaller digestible pockets of information that will help guide the individual through their yes or no reasoning.

The design will focus on delivering the details of the measure being voted on with key points and background information. Just because they are interested in the material, you need to maintain that interest throughout. You must also offer ways in which they can learn more about a particular part of the measure. If you need 1,000 words to explain a portion of that law, do not try and fit it into the brochure but offer an intro to that information with a link or qr code to learn more.

The folding of the brochure is up to you. Whether it is a simple tri-fold [ hopefully not - PLEASE ], a smaller gate fold, a roll or a z-fold to name a few, the design must incorporate a die cut for the circle and slit near the top. You must incorporate one other die cut in the design - does not need to be in the middle of the layout. Mock ups should be printed often using any printer. HOWEVER, the finished design will be printed double sided. There is no limit to the number of papers used to build the finished brochure. There is no size requirement only that it must work as a door hanger. The die for the hole needs to work properly and hang straight down - this is important if your solution to folding is unique and utilizes angles.

How the content you have about the question is broken up across the brochure is important. How that information is delivered to a person who is wants to learn more is the point of this project. The design layout should deliver the content in a clean and effective way for a person to quickly work through and read. Photos and graphics are important and should be used to compliment the text in delivering a balanced composition.

gained knowledge

  • build on your knowledge or introduction of indesign and learn to set up a file properly to be printed using unique folds and die cuts
  • learn how to place images into the document
  • understand bleeds and safe margins to allow shifting
  • build a layout that allows a person to interact with a uniquely folded brochure
  • capture and maintain a person’s interests through the use of text, images and graphics - learning that a sea of text will often go unread
  • control the person’s eye across a multi-page design
  • strengthen your type skills and learn about hierarchy across the brochure
  • build on the importance of consistency across the entire project
  • learn when to re-rag your paragraphs, avoid widows and orphans as well as rivers in your copy
  • build on the treatment of type when it comes to copy versus headline or stand alone blurbs
  • develop comfortable line lengths in narrow columns of text

project requirements

  • design a brochure that can be used as a door hanger with a folding technique that delivers your content and is broken down into sections
  • question number clearly identified
  • introduction text
  • background information on what a yes or no vote will offer
  • visually exciting with infographics
  • qr codes or links to learn more
  • incorporate a die cut into your layout
  • royalty free images used
  • cite your sources for images and information
  • upload research/mood board with notes to drive

grading scheme

  • 6 of 6 : the overall design and aesthetic appeal of the brochure
  • 6 of 6 : how the information is broken down and delivered - are the layouts balanced
  • 4 of 4 : creativeness of the folds and die cuts [no tri-folds]
  • 1 of 1 : following the project specs
  • 3 of 3 : participation & research/process of the project

project three overview

  • choose the measure you will design for
  • explore options for folding techniques - CREATE MINI MOCK UPS
  • set up your file in either indesign or illustrator - depending what folding technique is chosen will determine this
  • drop all of your text into the document by separating out the information into sections
  • look for hires images and work out other graphics to include - GRAPHICS MUST BE YOUR OWN DESIGN
30 OCT

class 02 of 07

  • smaller copy text should remain consistent in the type treatment
  • work out a hierarchy for each section [THIS NEEDS TO BE CLEAR] - each section needs to work together visually
  • each section should deliver it’s message and the importance of that section with a way to learn more
  • break down the sections for a person who spends - 5 to 10 seconds then 15 to 30 seconds then time to read every single word
  • start bringing in images for the designs - work on your graphics
01 NOV

class 03 of 07

  • continue working on the sections, making sure the panels of the brochure flow visually
  • test print your design, trim and fold to see how the design works - even if the design is smaller in scale
06 NOV

class 04 of 07

  • continue to work your overall designs
  • ask questions like, what stands out, does this engage the viewer quickly enough, does the layout flow
08 NOV

class 05 of 07

  • continue to tweak and finalize the designs
  • test print again - trim and fold
13 NOV

class 06 of 07

  • make any changes to the design that will help the hierarchy of information - prepare for class crit
15 NOV

Class 07 of 07

  • show up to class with completed designs, folded and trimmed perfectly for the crit at start of class
  • reflect on the feedback and make any appropriate changes
20 NOV

projects are due

  • upload your designs to the google drive IN A SINGLE PDF

Approach

Each project will have specified due dates during the course of the semester. The outline for each project will follow a tight schedule with multiple milestones that should be followed closely. As each aspect of a project relies on one another, falling behind will cause delays in the implementation of your rationale and solution. More importantly, not receiving critical feedback and having proper time to digest that criticism, will hinder your ability to improve and further your skills. Throughout this course, you will receive criticism and feedback from myself and other students. Learning how to digest this feedback and apply to your design is a major part of this course. Knowing and understanding how is absolutely important - but articulating the why is equally important.

During this class, you will develop projects ranging from print to screen, from logo/branding to packaging and publication. Each project will be multifaceted and cater to a unique design problem. Focusing entirely on one aspect of the assignment will not yield a successful design. Approaching each project from a wide lens then narrowing in on key specific elements is the point of these four projects. ASK QUESTIONS from the start and throughout each project. Constantly ask questions and challenge yourself.

Utilizing different methods of printing and the industry standard software used to develop the end design pieces will be covered in more depth for each of the projects and assignments.

There will absolutely be last minute curve balls thrown at you during projects.

Each project that will be designed in class will differ just as each student will have different taste, direction and subject. Because of this, it will allow for a much diverse range in projects that will at times have students being pushed in different directions as their project demands. Never does one set of rules govern design just as the process and approach often will too. Certain rules can be broken and yet some absolutely must not. If you like to break rules, I welcome the challenge but you had better be prepared to offer a clear rationale as to why you are correct.

Each project will be developed on screen and accompanied with multiple applications that will differ from project to project. Printing out your designs and seeing how they look off screen is vital. The contrast and quality of images and color along with type readability without the back glow of the screen, can only be perfected with prints. You will be asked to use software you have already used in previous courses and throughout this semester your knowledge using these will be strengthened.

This class is about problem solving but more importantly understanding how your decisions and finalized executions affect all future components going forward. Often, a design may work perfect for one application but falter or fail in a complimenting one. This will force you to back track and redevelop your ideas and direction. It is rare when a set of design rules is created in isolation on one part of a project that can work perfectly across multiple aspect of the umbrella.

On project due dates, come to class with the project already completed and uploaded. We will not be printing projects to submit - though printing should be used through the design process. Projects must be uploaded before class starts on the due date.

Projects are due on a specific date and if missed, will be docked a full letter grade for every class meeting that passes. If you upload your project five minutes after class starts, it is late. These projects will require work done outside of class time. Please balance your commitments and do not fall behind. You may resubmit any project for grading until the last week of classes - unless that project was handed in late.

Structure of Class Meetings

SE122 is arranged to have four students at each section with enough room to spread out your laptop, tablet, sketchbook and any other tools you will require throughout our class meeting. The design work developed while in class will allow you to engage with me throughout our class time. I always try my best to see everyone and give as much time to address any questions that need answering while providing feedback/direction during our scheduled time. If time does not allow for everyone to have this one on one discussion, those students not seen will be the first to have an opportunity the following class [ I will keep track and bounce around throughout the semester ]. Every class should be spent progressing your project.

Outside of class design work will be looked at and discussed at the start of the following class. How much time should be spent outside of the meeting hours will vary from student to student and fluctuate from project to project.

Evaluation

Music, fashion, film and art is highly subjective and one can always argue what is considered good. What is bad. But what separates design is that it does have a foundation and a set of rules that govern what is successful and what is not. Everything that makes our lives rich and exciting is pulled into design. Fine art can be used to solve a complicated problem. An all type driven composition solves a problem that a photo just could not. Then a photo can become a powerful message without the use of any additional words. In class, we all have our own style. We have our likes and dislikes when it comes to design. We also all have our comfort zone that we fall back on when ideas hit a snag or a solution unravels. How you will be graded never takes into account what my style is, what I consider “good” design is. Rather could your idea, your solution, your style be stronger? Are there flaws in your execution? Could your design be pushed further? These are the values in which you will be evaluated on.

Allowing yourself to go backwards in your process when developing the complete project will yield a stronger complete design. Identifying flaws in your design as the project progresses is expected. Don’t allow yourself to become rigid and solidify a part of the overall project before developing the other complimenting pieces. All possible directions should be conceptualized prior to execution and finalizing each design to a degree in which will help your overall portfolio presence.

Though I do not grade individual projects against other student projects, it is a great way for you to see where your design stands in relation to the other work being produced around you.

During this semester you will be given both projects as well as assignments. Each assignment is generally conducted outside the class that lead into a project. They are worth less than projects but can have an impact on your final grade. If you miss class when a class assignment is given, it is your responsibility to reach out to myself or a classmate to ask what is being asked. There will also be smaller assignments that have a whole semester arc. These are intended to strengthen your decision making but also should be conducted in the appropriate timeframe. Often you will be asked to work on these assignments for no longer than 10-15 minutes at most. Please do not treat these as projects for your portfolio but also do not toss them aside as insignificant. I have never nor will I ever assign busy work for you to complete. Everything during the semester has a purpose.

Response Times

Kindly use jpardee@rwu.edu to communicate with me outside of class. I check email daily Monday - Friday, so you can expect a response generally within 24 hour.

Will return submitted work graded with comments and feedback within two weeks after submission.

Preparedness

Please come to each class prepared to show progress with the current project. Be sure to have continued your work outside of class and arrive with a substantial amount of work to show. Pay attention to the project handout and check the milestones outlined in the time line. It is recommended a total of two to four hours a week will be spent working on projects outside of class. You will gauge rather quickly how much time will be needed outside of class to complete and progress your ideas and concepts. As in many aspects of life, there is not an exact formula for creating a design piece or learning a subject matter. If you are constantly coming to class each day with zero progress from where you left off the previous class, you need to ask if you are truly happy with the progress you are achieving in this course.

People work at varying speeds and students as well as professional designers will run into walls that will at times feel exhausting. Allowing enough time to work through these setbacks will ensure you are not running around last minute when projects are due.

Just as in other design classes and projects, the first solution seldom yields the strongest result. Your rationale and executions will evolve over time and you must document this progression and allow time to reflect. Your prints should be placed in your sketch book with notes written next or over your printed pieces. This will play into your research portion of your grade.

You must also keep track of feedback. Not only from classmates during a class crit but throughout the project where myself or others will provide insight into your solutions. Each project should be approached from different angles. Not just one solution from conception to completion.

Class crits will begin precisely at the time discussed so all students have ample time to show their work and receive the critical feedback from fellow classmates. Then if time allows, the remainder of class will be spent reflecting and absorbing that criticism. Deciding which feedback will be useful and how it can help strengthen your project. These crits are vital to learning how one can articulate reasons for their design choices and re-evaluate those reasons. The crit is important for each project and will count towards your project grade. Please do not miss class when a crit is scheduled. If missed for any reason what so ever, those points can not be recovered.

Grading Criteria

The following is a general guideline that will be used in grading your work during this semester. As you work on projects, it would be wise to ask yourself where your project fits within the scheme of the below outline. On every project handout, a more detailed outline of expectations will be provided.

  • the quality and aesthetic appeal of the completed design - flawlessness
  • the uniqueness & creativeness of solving the design problem
  • strength of all the pieces as a whole in a project - consistency
  • research / process of the project - mapping out your ideas & progress
  • following project specifications - completing the entire assignment
  • preparedness for / participation during class and in class crits

You are allowed to resubmit any project after making any corrections - unless the project was submitted late. You can not recover points lost for late projects.

Tutorial Assignments / Homework

You will be assigned homework throughout the semester. Each assignment will coincide with the project you are currently working on. They are all pass fail and you will be asked to resubmit any homework not done to proper specs. The total homework grade will account for one project and can significantly affect your final grade.

Gained Knowledge

The end of the semester you will have a clear understanding of how your decisions for a design problem echoes across multiple aspects of a much larger and complex solution. That design solution needs to meld and mold for the greater good rather than just a single design piece. Each project will be rooted in reality thus giving you design problems that you may face later in your career.

In the end, you will have four completely polished multifaceted design projects for your portfolio. You will have also strengthened your skill set and knowledge that was acquired in previous courses.

Absences

In the interest of sustaining a healthy design community, it is program policy for students to be present for in-person learning, participation, and engagement in course content. It is permissible for students to miss up to two classes throughout the semester without penalty. If absent, students are responsible for contacting faculty and are expected to be prepared for their next class in alignment with the schedule.

Beyond the two absences, each subsequent absence will impact the project’s process and participation points, as outlined in the course syllabus. More than six unexcused absences (3 weeks of course content) may result in a final grade of “F” due to missed lectures, demos, feedback sessions, and in-class activities. These policies pertain equally to online courses and those offered in person.

In the case of severe illness or crises, please consult with your instructor and your academic advisor to determine whether you should withdraw or request an (I)ncomplete grade in the course.

Emergency Preparedness

RWU utilizes an RWU Alert system which serves as the university’s primary communications tool for alerting campus community members to urgent situations. When activated, the system sends phone, email, and text messages regarding incident that could affect their safety. The university also hosts an emergency siren warning system that broadcasts alarms and voice instructions when activated. In the case of a fire alarm, individuals should proceed outside of the building. All buildings include instructions on what to do in the event of each type of emergency.

Additional information regarding what to do in the event of a campus emergency

Campus emergency contact information

COVID-19 Classroom Protocols

Mask wearing (high quality N95 or KN95) in indoor settings is considered an effective and recommended practice by the Centers for Disease Control and the American College Health Association and has been proven effective at RWU. The University reserves the right to require mask wearing in any indoor setting when deemed necessary, and we support any individual who chooses to wear a mask to protect themselves or others.

Visit www.rwu.edu/covid-protocols for information on our Covid protocols throughout the year.

In the event you test positive for COVID-19 throughout the academic year, you are required to report your positive test result.

Academic Integrity

Graphic design communication is a profession that values originality and integrity in the creative process. All your finished projects should be your own work. In addition, Roger Williams University holds the highest standard for academic integrity.

Please review the university’s policies on academic integrity, www.rwu.edu/academics/academic-affairs/academic-standards

Please note that course materials distributed by an instructor are the intellectual property of the instructor and may not be shared or distributed without permission.

The Tutoring Center

The Tutoring Center, which is comprised of the Math, Science, Writing, and Modern Languages Centers and which also provides tutoring for some Economics, Accounting, Computer Science, Engineering and Construction Management courses, is located on the second floor of the Main Library. You can walk in and see a peer tutor; appointments for faculty tutors are encouraged. All tutoring is free. You are encouraged to visit the Center to ask questions, whether it’s about course-specific tutoring, specialized study groups, or how to get the most out of tutoring. In addition, the Writing Center offers a second option for tutoring: an email tutoring system at this website: www.rwu.edu/go/email-writinghelp The WritingHelp email system is not in-person tutoring (for in-person help, please come into the Writing Center); it provides an email address to send your paper to a tutor for help.

The Tutoring Center offers assistance Monday through Thursday 9:00 am to 8:00 pm; Friday 9:00 am to 3:00 pm; Sunday 2:00 pm to 8:00 pm. For additional information about the Centers, including tutor schedules, please see www.rwu.edu/go/tutoring

Student Accessibility Services

The University has a continuing commitment to providing reasonable accommodations for students with documented disabilities. Students with disabilities who need accommodations in order to fully participate in this class are urged to contact Student Accessibility Services, as soon as possible, to explore the arrangements needed to be made to assure access. Student Accessibility Services is located on the first floor of the University Library and is open Monday through Friday from 8:00 am to 5:00 pm. They can be reached at sas@rwu.edu and 401-254-3841.

For more information about SAS, visit www.rwu.edu/undergraduate/academics/student-academic-success/studentaccessibility-services-sas

Preferred Name Policy

Roger Williams University has an optional Chosen Name Policy that allows students to update their name in our University records without requiring a legal name change. Students who might consider using such a change include members of our transgender communities. Students can update their name through their Student portal, click on Student, then User Account. Preferred Personal Information should appear and they can update their name there. Should students have any questions or concerns, please reach out to the Registrar’s Office or Jamie Wire ( jwire@rwu.edu ).

Title IX at RWU

Faculty at RWU are designated “responsible employees”, and therefore mandated to report Title IX related disclosures to the Title IX Coordinator. There are resources both on and off campus to assist students through a difficult and challenging situation.

Additional information regarding your rights and resources are available here.